

A Guide to Creating Mixed Media Animations in Adobe After Effects
- Noel Powell
- Jul 24, 2025
- 3 min read
Updated: Jul 31, 2025
Mixed media animation is trending! I see some version of it in nearly every commercial break I watch. It’s a energetic, creative medium that blends video footage with the hand-made aesthetic of scrapbooking.
Traditionally, the process involves printing several frames per second of your video onto paper, then decorating each frame by hand – drawing, painting, scratching, and collaging physical elements onto them. The frames are then photographed or scanned back into the computer and edited into an animation. The results are stunning, but the process is tedious and time-consuming.
Fortunately, you can now recreate this entire workflow digitally in After Effects, and with far less effort.
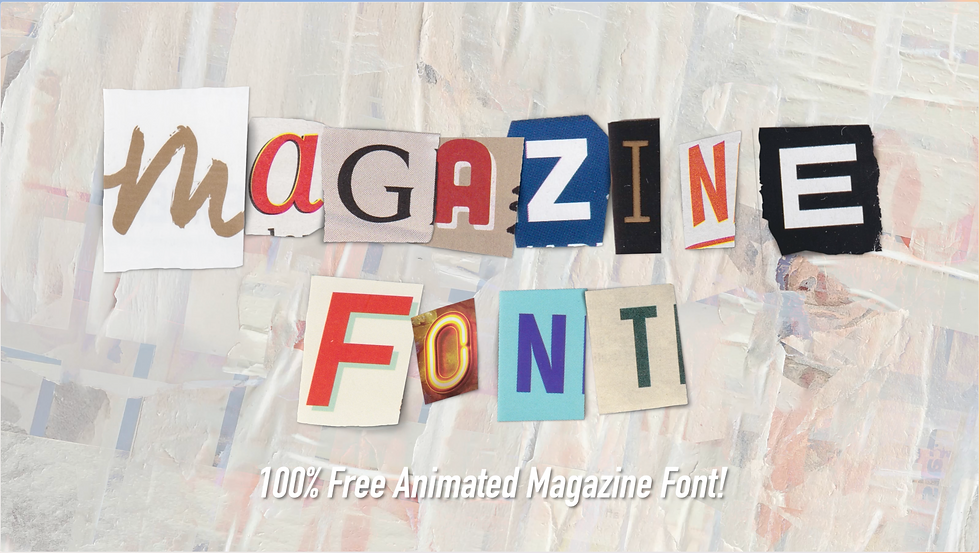
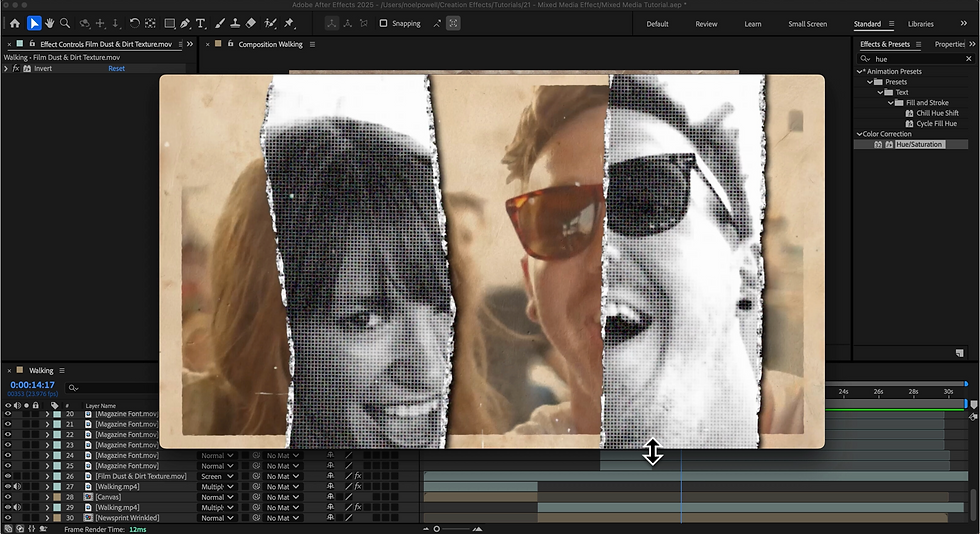
I recently released an in-depth tutorial that walks through several techniques for creating mixed media animations in After Effects. It’s accompanied by the free Mixed Media Toolkit—a downloadable collection available on the Freebies page at CreationEffects.com. The toolkit includes texture images, collage elements, animated doodles, and an animated magazine-style font.
In the following article, I’ll go over some of the core techniques I covered in the tutorial:
Frame Rate: Simulating Stop-Motion
The stop-motion look is one of the defining features of mixed media animation. To replicate it:
1. Add an Adjustment Layer at the top of your comp and name it “Stop Motion Effect.”
2. Apply the Transform effect and add a wiggle expression to the Scale, Position, and Rotation properties to make the animation jitter slightly from frame to frame.
3. Add the Posterize Time effect and lower the frame rate to something like 6 fps.
This creates a choppy, handmade feel that mimics stop-motion animation.
Animated Textures
Like traditional collages, mixed media animation often features rich, varied textures—think foil, fabric, or crumpled paper.
• Start by importing the texture images from the Mixed Media Toolkit, or download high-res textures from a free stock image site like Pixabay.com.
• Place each texture in its own precomp, and apply wiggle expressions to their Position and Rotation to make them subtly shift each frame, as if a new texture was photographed each time.
• Set one animated paper texture as your background. Place it below your footage, and change your footage’s blending mode to Multiply. Scale your footage down about 15% to reveal the paper margins.
You can also:
• Overlay other animated textures using different blending modes for stylized, artistic looks with your footage.
• “Cut out” shapes with the Pen Tool, apply a Drop Shadow effect, and animate them with wiggle expressions—mimicking the feel of physical paper elements being rearranged by hand.
• The toolkit also includes a 10-second film dust overlay. Just drag it into your comp, set the blending mode to Multiply, and get an instant grungy, analog vibe.
Drawing and Doodling
For hand-drawn effects:
• Use the Pen Tool to draw strokes or handwritten text, creating a new Shape Layer.
• Add a Stroke in the Shape settings, and adjust color and width as desired.
• Apply Roughen Edges to simulate ink bleeding into paper.
• Add a wiggle expression to the Random Seed of Roughen Edges so the stroke changes every frame.
You can also drag in animated doodles from the toolkit. These public domain drawings have been cleaned up and optimized for easy compositing—just set the blending mode and you’re good to go.
Text
Text can also be hand-drawn using the Pen Tool with a stroke. To add movement and imperfection:
• Apply Turbulent Displace and use a wiggle expression on the Random Seed to create wiggly, animated text that feels hand-written and alive.
For faster results, use the Animated Magazine Font from the toolkit:
• Drop the clip into your comp, mask out the needed characters, and duplicate the layer as needed to build your title.
Advanced Effects (Covered in the Video Tutorial)
Here are some more advanced techniques to explore in the full tutorial:
• Add torn paper edges to masked textures.
• Create a halftone effect to mimic newsprint.
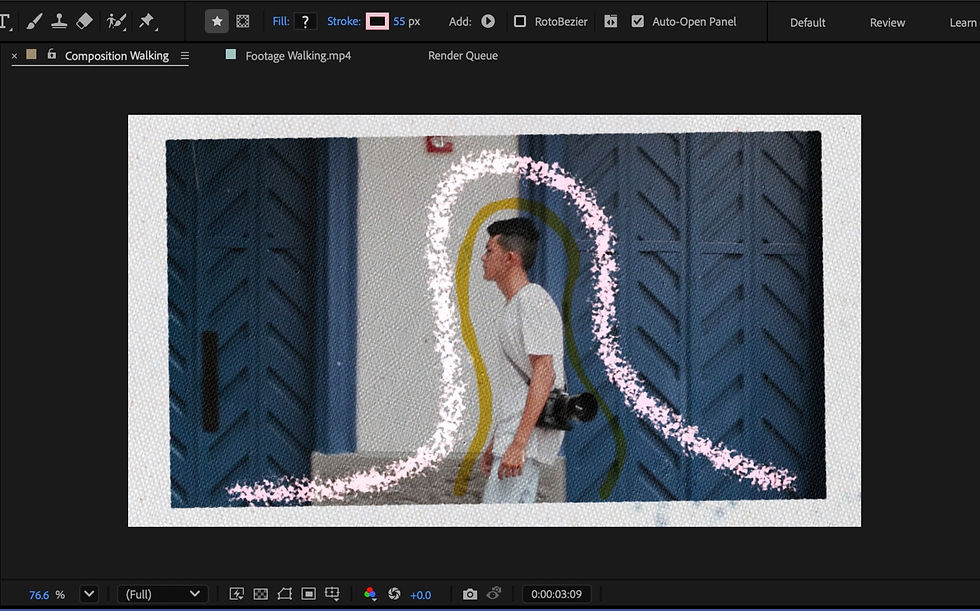
• Use the Roto Brush to isolate your subject, then apply textures and cutout effects.
• Apply the Scribble effect to masked areas for a hand-colored look using virtual pencil, pen, or marker.
Final Thoughts
The Mixed Media Toolkit and the free tutorial give you everything you need to start crafting creative,
textured animations that look handmade. But if you want to go deeper and save time, check out the Mixed Media Effect template from Creation Effects. It includes all the techniques above, plus dozens of pre-built, drag-and-drop effects—removing the tedious steps so you can focus on creative expression!


Comments